The Perfect Shot Starts Here: Installing a PID Controller on Your La Marzocco Linea Mini
Hey there, fellow coffee lover! Have you ever sipped an espresso and thought, “This could be better”? Well, you’re in the right place. I’m here to guide you through enhancing your La Marzocco Linea Mini with a PID controller. This upgrade is a game-changer for consistency and flavor in your espresso shots. Let’s get your machine to match your passion for that perfect cup.
Key Takeaways
-
Understand what a PID controller is and why it’s crucial for your espresso.
-
Learn the benefits of installing a PID controller on your Linea Mini.
-
Discover the tools and components needed for a smooth installation process.
-
Get a step-by-step guide to attach and configure your new PID controller.
-
Find out how to maintain your PID for the long haul and keep pulling epic shots.
Understanding PID Controllers in Espresso Machines
Before we dive into the installation, let’s chat about what a PID controller does. PID stands for Proportional-Integral-Derivative. It’s like a smart thermostat for your espresso machine, constantly adjusting the boiler’s temperature to ensure it’s just right for extracting espresso. The result? A more consistent taste in every shot.
What is a PID Controller?
A PID controller is your secret weapon for nailing the temperature sweet spot. It takes the guesswork out of brewing by using algorithms to adjust the heat. This means no more bitter or sour shots because the water was too hot or too cold. Your Linea Mini is about to become a precision instrument for your coffee creations.
Improving Espresso Quality with PID Temperature Control
Temperature stability is key to unlocking the full potential of your coffee beans. With a PID controller, your Linea Mini will maintain the water at the ideal temperature throughout the brewing process. This stability means you can expect a richer, more balanced espresso every time you pull a shot. It’s like giving your taste buds a VIP coffee experience.
Gathering the Essentials for Installation

Getting ready for a PID install is like prepping for a great adventure. You’ll need the right gear to ensure everything goes smoothly. Your toolkit should include some basics like a screwdriver, pliers, and perhaps a multimeter if you want to get really precise. But the star of the show is the PID controller kit itself, which should have all the specialized parts you’ll need. Let’s make sure we have everything on hand before we embark on this journey to espresso excellence.
Tools and Components You’ll Need
-
PID controller kit compatible with the La Marzocco Linea Mini
-
Flathead and Phillips screwdrivers
-
Needle-nose pliers
-
Wire strippers (if your wires aren’t pre-stripped)
-
Electrical tape or heat-shrink tubing for insulation
-
Zip ties to tidy up loose wires
-
Optional: Multimeter for testing electrical connections
-
Patience and a can-do attitude
With these tools at the ready, you’re well on your way to taking control of your espresso’s destiny. Each item in your kit plays a crucial role, so double-check to make sure nothing’s missing before you start.
Preparing Your Workspace
Imagine you’re a surgeon preparing for an operation. You wouldn’t want clutter all over your operating table, right? The same goes for installing your PID controller. Clear off a space where you can lay out your tools and components. Make sure it’s well-lit so you can see what you’re doing. A clean, organized space will help keep your mind focused and reduce the risk of any mishaps.
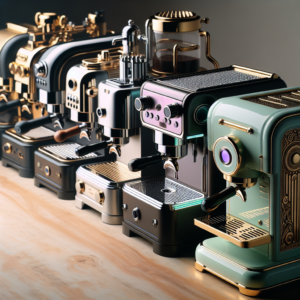
Installing the PID Controller: A Step-by-Step Guide

“La Marzocco Linea Mini » CoffeeGeek” from www.coffeegeek.com and used with no modifications.
Installation time! This is where we turn your Linea Mini from a great machine into an exceptional one. Follow these steps closely, and you’ll be sipping on the fruits of your labor in no time.
Attaching the PID Controller to the Linea Mini
With your workspace ready, power off and unplug your Linea Mini. Safety first! Open up the machine’s housing by removing the screws. Locate the area where the PID controller will live; it’s typically near the boiler. Secure the PID controller in place, ensuring it’s stable and won’t shift during use. This is your machine’s new brain, so treat it with care.
Wiring the Controller: Safety and Best Practices
Wiring can seem daunting, but you’ve got this. Your PID kit comes with instructions—follow them to the letter. Connect the wires from the PID to the boiler’s temperature sensor inputs. If you’re not familiar with electrical work, it’s a good idea to have a professional take a look. Remember, no shortcuts when it comes to electricity and your beloved espresso machine.
Testing and Initial Calibration
Before you close up the machine, it’s time to test. Plug in your Linea Mini and power it on. Watch the PID controller’s display; it should light up and start reading the boiler’s temperature. Use the instructions to set the desired temperature for your espresso. Let the machine heat up, then pull a test shot. It may not be perfect yet, but it’s a start. Calibration is a dance, and you’re leading.
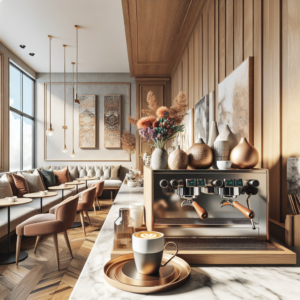
Configuring the PID Controller for Optimal Performance

“La Marzocco Linea Mini » CoffeeGeek” from www.coffeegeek.com and used with no modifications.
Once you’ve got your PID controller installed, it’s time to fine-tune it to get the best possible performance. Think of this like tuning a guitar before a concert. You want everything to be pitch-perfect to hit those high notes in your espresso’s flavor profile.
Understanding the Basics of PID Settings
The PID controller has three main settings: Proportional, Integral, and Derivative. These settings work together to keep your machine’s temperature steady. Here’s a quick rundown:
-
Proportional – This is how much the PID reacts to temperature differences.
-
Integral – This helps correct any drift from your set temperature over time.
-
Derivative – It anticipates future temperature changes and adjusts accordingly.
Getting these settings right is crucial for that consistent heat we talked about earlier. It’s all about balance, and a little tweaking goes a long way.
Adjusting Temperature for Your Espresso Preferences
Now, let’s personalize your machine. You might like your espresso with a bit more bite, or maybe you’re into a smoother, sweeter taste. The PID controller lets you adjust the temperature to suit your preference. Start with the recommended settings from your PID kit, then experiment with small adjustments. Take notes on each change and how it affects your shot. It’s like being a scientist, but for coffee!
Remember, even a one-degree change can make a noticeable difference in your espresso’s flavor. So, take it slow, be methodical, and enjoy the process of dialing in your perfect shot. With the PID controller finely tuned, you’re ready to consistently produce the best espresso you’ve ever tasted, right from the comfort of your home.
Maintaining Your PID Controller

Now that your PID controller is installed and dialed in, let’s make sure it stays in tip-top shape. Like any good relationship, a little care and attention go a long way. Maintaining your PID controller isn’t just about longevity; it’s about ensuring every espresso shot you pull is as divine as the last.
Regular Check-Ups and Troubleshooting
Keep an eye on your PID controller’s performance. Every few months, take a moment to verify that the temperature readings are accurate. If something seems off, it might just need a recalibration. It’s also a good idea to check the wiring and connections for any signs of wear or loose connections. A quick fix now can save you a headache later. And if you ever run into an issue that’s got you stumped, reach out to the coffee community or a professional. You’re not alone in this!
Cleaning and Care for Longevity
Cleaning might not be the most exciting part of coffee making, but it’s essential. Keep the area around your PID controller dust-free. If your machine needs descaling, take care to protect the electronics from any water or descaling solution. A little preventative care will keep your PID controller, and your espresso shots, in pristine condition.
Frequently Asked Questions (FAQ)

Why is precise temperature control important for espresso extraction?
Temperature is everything when it comes to pulling the perfect espresso shot. Too hot, and your coffee will taste burnt and bitter. Too cool, and you’ll miss out on the full spectrum of flavors your beans have to offer. Precise temperature control allows you to extract the best flavor profile from your coffee, giving you a consistent, high-quality shot every time.
Can I install a PID controller on any espresso machine?
While many espresso machines can be upgraded with a PID controller, not all are suitable candidates. It depends on the machine’s design and how the boiler is controlled. Some machines come with a built-in PID, while others, especially older models, might not support one without significant modifications. Always check the compatibility of your espresso machine with a PID controller before making any changes.
What should I do if my PID controller isn’t responding as expected?
If your PID controller seems unresponsive or isn’t functioning as it should, don’t panic. First, double-check all your connections to make sure everything is secure. Loose wiring is often the culprit. If that doesn’t solve the issue, consult the troubleshooting section of your PID manual. Sometimes, a factory reset is all it takes to get things back on track. And if you’re still stuck, it’s a good idea to reach out to the manufacturer or a seasoned technician. Remember, it’s about precision, so patience is key.
How frequently should I calibrate my PID controller?
Calibrating your PID controller is like tuning a guitar before a jam session – it’s essential for a great performance. Do an initial calibration when you first install the PID controller to ensure it’s reading temperatures accurately. After that, a check-up every few months should suffice, unless you notice something off with your espresso’s taste. If you’re a heavy user, or if your machine has had a bit of a knock, it might need a little more TLC. Keep your senses sharp; your taste buds will tell you when it’s time for a tweak.
Are there any risks associated with installing a PID controller?
Installing a PID controller does come with risks, especially if you’re not comfortable with electrical components. The biggest risk is to your machine if the installation isn’t done correctly. There’s also a small chance of electric shock if you’re not careful. To minimize risks, always unplug your machine before you start, follow the instructions to the letter, and don’t be shy about asking for professional help if you need it. Your safety and the integrity of your Linea Mini are paramount.
In conclusion, upgrading your La Marzocco Linea Mini with a PID controller is a journey that leads to the destination of espresso excellence. It’s about enhancing your craft, refining your skills, and elevating your home barista experience. You’ve learned the essentials of what a PID controller is, how it improves your espresso, and the steps to install it properly. You’re equipped with the knowledge to maintain and calibrate your PID, ensuring it serves you well into the future.
Remember, the path to the perfect espresso shot is a blend of science and art. With your PID controller now in place, you’re ready to explore the depths of coffee flavors and textures like never before. So go ahead, pull that first shot with your newly upgraded machine. Savor the aroma, taste the balance, and enjoy the satisfaction of knowing you’ve taken your espresso game to the next level. Happy brewing!