Key Takeaways: Mastering the PID Upgrade for Your Breville Barista Express
-
Discover the importance of a PID controller in brewing flawless espresso.
-
Learn what tools and components are necessary for a smooth installation process.
-
Get to know your Breville Barista Express inside and out.
-
Understand the critical safety measures to take before beginning the upgrade.
-
Choose the perfect PID controller tailored for your espresso machine.
The Role of a PID in Perfecting Espresso
Imagine having the power to brew espresso that rivals your favorite coffee shop, right in your own kitchen. That’s the magic a PID (Proportional-Integral-Derivative) controller brings to the table. It’s all about precision; this nifty gadget meticulously controls the temperature of the water hitting your coffee grounds. And when it comes to espresso, temperature is king. A few degrees too hot or too cold, and your shot could end up bitter or sour. A PID keeps things just right, every single time, ensuring each cup is a masterpiece.
Tools and Parts You’ll Need for the Installation
Before diving into the installation, let’s gear up. You’ll need a few key tools: a screwdriver set, pliers, and perhaps some wire strippers. As for parts, the star of the show is the PID controller itself. You’ll also want some high-temperature tape and possibly some additional wiring, depending on your model. Keep all these close by, and you’ll be set for a smooth installation journey.
Understanding Your Breville Barista Express
Your Breville Barista Express is more than just a machine; it’s your partner in the quest for the ultimate espresso. It’s essential to understand its components and how they work together. Familiarize yourself with the boiler, the group head, and where the thermostat is located. This knowledge will not only help with the PID installation but also deepen your connection with the brewing process.
Ensuring Safety Before You Start
Safety is paramount when it comes to working with electrical appliances. Always unplug your espresso machine before you begin. Make sure you’re working in a well-lit area and that your tools are in good condition. And remember, patience is your ally. Rushing through the process can lead to mistakes that might be more than just inconvenient—they could be hazardous.
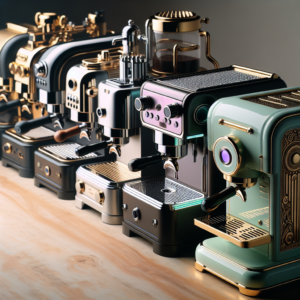
Selecting the Right PID Controller

Choosing the right PID controller is like finding the perfect bean for your espresso—it can make all the difference. Look for a controller that is compatible with the Breville Barista Express. It should be able to handle the power requirements of your machine and fit within the available space. Features like an easy-to-read display and customizable settings are also big pluses, giving you control and feedback for your brewing experiments.
Compatibility with Breville Barista Express
Not all PID controllers are created equal, and it’s crucial to pick one that meshes well with your Breville Barista Express. The right fit will seamlessly integrate without overwhelming the machine’s existing layout. Check the voltage and current specifications to ensure they align with your machine. A compatible PID will promise a smoother installation and a more reliable performance, keeping your espresso game strong.
Features to Look for in a PID Controller
When selecting a PID controller, think about the features that will elevate your espresso experience. A clear, easy-to-navigate display is a must for monitoring temperatures at a glance. Programmability is another key feature; it allows you to dial in the exact temperature for different roasts or types of coffee. Some PID controllers even offer features like shot timers or pressure control, adding layers of precision to your brew.
Understanding PID Specifications for Espresso Machines
Getting into the nitty-gritty of PID specifications can be a game-changer for your espresso quality. Pay attention to the temperature range and accuracy; a good PID should offer a range that covers the ideal brewing temperatures for espresso (typically between 195°F to 205°F) with an accuracy within 0.1°F. Also, consider the controller’s response time and how quickly it adjusts to temperature changes, ensuring consistent heat from shot to shot.
A Step-by-Step Installation Guide

Now, let’s walk through the installation process. With the right tools, a bit of patience, and a steady hand, you’ll have your PID controller up and running in no time. Follow these steps carefully to ensure a successful upgrade to your Breville Barista Express.
Pre-Installation: Disassembling Your Machine
Begin by powering off and unplugging your espresso machine. Remove the water tank, drip tray, and any other removable parts. Using your screwdriver, gently disassemble the casing of your Barista Express to access the internal components. Take pictures or notes as you go along to remember where each part fits when it’s time to reassemble.
Mounting the PID Controller
With the internals of your machine exposed, identify a suitable spot to mount your PID controller. It should be close enough to the boiler for accurate temperature readings, yet positioned where it won’t interfere with the machine’s operation. Use high-temperature tape or mounting brackets provided with your PID kit to secure the controller in place.
Connecting the Wires to the Breville Barista Express
Now comes the intricate work of wiring. Carefully connect the wires from the PID controller to the machine’s thermostat and heating element, following the wiring diagram that came with your PID. Ensure that all connections are tight and secure. If you’re not comfortable with this step, it might be worth consulting with a professional to avoid any mishaps.
Post-Installation: Reassembling Your Machine
After connecting your PID controller, it’s time to put your Breville Barista Express back together. Reverse the disassembly steps you took earlier, referring to your notes or photos to ensure everything goes back in its rightful place. Replace the casing, screwing it in securely, and reattach all the parts you removed. With everything in place, plug in your machine and power it on. You’re now ready to dial in the PID settings and start brewing!
Elevate Your Brew: Why Install a PID Controller

So, why go through the trouble of installing a PID controller on your espresso machine? The answer is simple: to take your brewing to the next level. With a PID, you gain the ability to control and stabilize brewing temperatures, leading to more consistent and flavorful espresso shots. It’s an upgrade for those who are serious about their coffee and want to get the most out of their Breville Barista Express.
Consistent Temperatures for Prime Espresso Shots
Consistency is the secret ingredient to exceptional espresso. A PID controller ensures that water heats to the exact temperature needed for extracting the full flavor profile from your coffee beans. This precision eliminates the guesswork and variability that can come with standard thermostats, giving you the confidence that each shot will be as good as the last.
The Pitfalls of Temperature Fluctuations
Without a PID, your espresso machine can experience temperature swings that have a big impact on taste. Too hot, and your espresso may taste burnt or bitter. Too cool, and it might be under-extracted, resulting in a sour or weak shot. These fluctuations can frustrate even the most patient baristas and leave your coffee’s potential untapped.
Comparing Pre and Post-PID Upgrade Results
Once your PID is installed, you’ll notice the difference in your espresso almost immediately. Pre-PID, you may have struggled with inconsistency and unpredictability. Post-PID, you’ll enjoy the stability and control necessary for top-notch espresso. It’s like giving your machine a new lease on life, one that promises a better cup every time.
Tuning Your PID for Optimal Espresso Extraction

Installing your PID is just the beginning. The real art comes in tuning it to work harmoniously with your coffee. This involves finding the sweet spot for temperature that brings out the best in your beans. It’s a process of trial and error, but with a PID, you have the precision needed to make small, meaningful adjustments.
Understanding the PID Settings
Getting to know the settings on your PID controller is key to mastering your brew. The ‘P’ in PID stands for ‘proportional’, which controls how aggressively the PID responds to temperature differences. ‘I’, or ‘integral’, helps eliminate any ongoing discrepancies, and ‘D’, the ‘derivative’, predicts future temperature drifts. Together, these settings help you maintain the perfect brewing temperature for espresso that’s nothing short of epic.
Finding the Perfect Temperature Profile for Your Coffee
Every coffee bean whispers its secrets, and with a PID, you’re well-equipped to listen. The perfect temperature profile varies from bean to bean, influenced by factors such as origin, variety, and roast level. Lighter roasts thrive at higher temperatures to fully express their bright and acidic notes, while darker roasts prefer lower temperatures to highlight their rich, chocolatey undertones. By fine-tuning your PID, you’re tuning into the language of your coffee, allowing its full spectrum of flavors to shine through in every cup.
Adjusting PID Settings Based on Bean Type and Roast
Different beans mean different needs. Your PID controller is the key to unlocking their potential. For instance, a bean with a fruity profile might require a slightly higher temperature to extract those vibrant notes. On the other hand, a bean that’s been roasted to bring out nutty flavors might do better at a lower temperature to avoid overshadowing its subtle complexities. Pay attention to the bean’s roast date too; fresher beans often need a bit more heat. It’s all about balance and finding what works best for your taste.
Maintaining Your PID-Equipped Breville Barista Express

“Breville Dual Boiler » CoffeeGeek” from www.coffeegeek.com
Just like any high-performance tool, your PID-equipped Breville Barista Express needs regular maintenance to keep it in tip-top shape. This means cleaning it thoroughly, checking connections, and ensuring the PID controller is functioning correctly. A well-maintained machine is a reliable one, ready to brew the perfect espresso at a moment’s notice.
Cleaning and Care for Longevity
Keep your espresso machine gleaming and your coffee tasting great with regular cleaning. This means descaling to remove mineral buildup, wiping down surfaces, and purging the group head and steam wand. Be gentle with your PID controller; it’s the brain of the operation. A soft cloth and a careful touch are all you need to keep it dust-free and working smoothly.
When to Consult a Professional
If you’re ever in doubt or encounter a problem that’s beyond your comfort zone, it’s time to call in the pros. Whether it’s unusual behavior from your PID controller, wiring issues, or just a routine check-up to ensure everything is calibrated correctly, a professional can provide peace of mind and prevent small issues from becoming big headaches.
Common Issues and Troubleshooting
Even with the best care, you might run into hiccups with your PID-equipped machine. Maybe the temperature isn’t holding steady, or the display is showing an error code. Often, these issues have simple fixes, like checking for loose connections or resetting the PID settings. Keep your manual handy for quick reference, and remember, most problems have a solution a few steps away.
FAQs: Your PID Upgrade Questions Answered

Got questions? You’re not alone. Upgrading your Breville Barista Express with a PID controller can seem daunting, but it doesn’t have to be. Here’s a quick rundown of some common queries to help clear the path to your perfect espresso.
Can I install a PID on older models of the Breville Barista Express?
Good news for those who’ve been brewing with their Breville for years: installing a PID controller is usually possible on older Barista Express models. The key is to ensure the PID kit you choose is compatible with your specific model. Some older machines might require additional steps or different wiring configurations, so be sure to read the PID’s installation guide thoroughly or seek advice from the manufacturer if you’re unsure.
Does adding a PID void the Breville warranty?
Let’s face it, warranties are like a safety net for your appliances. It’s important to note that modifying your Breville Barista Express with a PID controller could potentially void its warranty. Manufacturers often consider such alterations as tampering with the original design, which can lead to warranty issues. If you’re within the warranty period and hesitant to risk it, you might want to wait until it expires before making any upgrades.
How long does it typically take to install a PID controller?
Installing a PID controller isn’t a race—it’s more about precision and care. For those who are handy and familiar with their machine, the installation could take as little as an hour. If you’re new to this kind of DIY project, give yourself a few hours to work without rush. Remember, taking your time can prevent mistakes and ensure that your PID controller is installed correctly for the best brewing results.
What are the signs that the PID needs recalibration?
Keep an eye out for the telltale signs that your PID might need a little tweak. If you notice that your espresso shots are suddenly not as consistent in taste or temperature as they used to be, it could be a sign. Another red flag is if the PID controller’s temperature readings start to drift away from the set values. These symptoms suggest it’s time to recalibrate and get back to brewing perfection.
Can I switch back to the default settings after installing a PID?
Flexibility is the spice of life, and yes, you can certainly return to your machine’s default settings after installing a PID controller. If you ever decide to go back to basics, resetting the PID to factory settings is straightforward. And if you want to remove the PID completely, it’s just a matter of reversing the installation process. This way, you can always revert to the original setup if that’s what brews your coffee best.
There you have it—the ins and outs of installing a PID controller on your Breville Barista Express. This upgrade is a journey towards precision, consistency, and the ultimate espresso shot. It’s about taking control of your coffee experience and tailoring it to your tastes. Whether you’re a seasoned barista or a curious coffee lover, a PID controller can be a game-changer for your home brewing setup.
Remember, coffee is a personal adventure, and there’s no one-size-fits-all approach. With a PID, you’re equipped to explore the vast world of espresso with more confidence and control than ever before. So go ahead, fine-tune those temperatures, experiment with different beans, and watch as your Breville Barista Express transforms into a beacon of barista-level craftsmanship. Happy brewing!