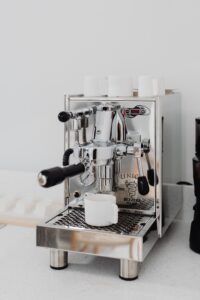
Imagine sipping on an espresso that’s the epitome of perfection – rich, robust, and with a flavor that dances on your palate. This isn’t the work of magic, but the precision of a PID controller in your espresso machine. Let’s explore how this game-changing device can elevate your coffee experience.
Unlocking the Precision of PID in Espresso Machines
When it comes to brewing espresso, consistency is key. A PID controller, which stands for Proportional, Integral, Derivative, is your secret weapon for achieving that barista-level consistency at home or in your cafe. It’s all about control, and with a PID, you’re in the driver’s seat.
What is a PID Controller and Its Role in Espresso Brewing?
A PID controller is like a smart thermostat for your espresso machine. It continuously calculates the temperature of the water in your boiler and adjusts the heat to maintain the perfect brewing temperature. This means no more guessing and no more bitter or sour shots caused by temperature swings.
Benefits of Installing a PID Controller in Your Espresso Machine
- Enhanced Flavor: By stabilizing the temperature, a PID controller helps extract the best flavor from your coffee beans.
- Consistency: Repeat the same delicious shot of espresso every time, whether it’s your first or fiftieth of the day.
- Control: Fine-tune the temperature to suit different coffee beans and roasts, unlocking their full potential.
- Efficiency: Save energy by preventing your machine from overheating or requiring constant manual adjustments.
- Longevity: Reduce wear and tear on your machine by maintaining a stable operating environment.
With these benefits in mind, let’s get down to the nitty-gritty of installing a PID controller.
Finding the Perfect Spot for Installation

Before diving into the installation process, you need to find the right place for your PID controller. It should be easily accessible for adjustments and away from high heat or moisture to avoid damage.
Assessing Space and Accessibility
Take a look at your espresso machine and identify a spot that’s easy to reach and has enough space for the PID controller. Ensure it’s not too close to the steam wand or any other high-heat areas. You want it to be functional, but also safe.
Tools and Materials Needed for PID Controller Installation
Here’s what you’ll need to get started:
- Screwdrivers: For opening the machine’s panel and securing the PID controller.
- Wire strippers and cutters: To handle the electrical components.
- Heat-resistant tape or adhesive: To mount the PID controller securely.
- Thermal paste: For ensuring good thermal contact between the temperature sensor and the boiler.
- Zip ties: To keep wires tidy and out of the way.
- Drill (if required): For creating mounting holes for the PID controller.
With your tools ready and the perfect spot picked out, you’re set to embark on the journey to espresso excellence. Stay tuned for the step-by-step guide to installing your PID controller.
Step-by-Step Guide to Installing Your PID Controller

Now that you’ve got your tools and space ready, let’s walk through the installation process. Remember, safety first! Ensure your espresso machine is unplugged and cool to the touch before you begin.
Preparing the Espresso Machine
Start by removing the housing of your espresso machine to access the internal components. This usually involves unscrewing panels or casing. Be mindful of where each screw belongs – keeping them organized will make reassembly a breeze. Once open, locate the boiler and the area where you’ll place the temperature sensor.
Mounting the PID Controller
With the location picked out, it’s time to mount your PID controller. Use heat-resistant adhesive or tape to secure the controller in place. If your setup requires drilling, carefully create mounting holes, ensuring you don’t damage any internal components. Then, fasten the PID controller with screws for a firm hold.
Connecting Wires and Sensors
Next up, wiring. This can seem daunting, but take it step by step. Connect the temperature sensor to the boiler using thermal paste for accurate readings. Then, run the wires from the sensor back to the PID controller, following the manufacturer’s wiring diagram closely. Use zip ties to keep wires neat and avoid any contact with moving parts or high heat.
Testing and Calibration
Before sealing everything up, it’s crucial to test your setup. Reconnect the power and turn on your machine. Watch the PID controller’s readings as the machine heats up and make sure they stabilize around your desired temperature. If the readings are off, you may need to calibrate the PID controller using its settings menu.
Optimizing Espresso Flavor with PID Settings

With your PID controller installed and tested, it’s time to fine-tune your espresso. The right temperature is essential for extracting the full flavor profile of your coffee beans. Start with a general recommendation, like 200°F (93°C)for most coffees, and adjust from there. Lighter roasts may benefit from a slightly higher temperature, while darker roasts might prefer a cooler setting. Experiment with small adjustments and taste the results until you find your sweet spot.
Remember, the goal here is to achieve a balance between the acidity, sweetness, and bitterness of your espresso. With a PID controller, you have the power to dial in that balance with precision. Happy brewing!
Finding the Ideal Temperature Range for Different Coffees
Every coffee bean whispers its secrets on how it wants to be brewed. Light roasts may sing at a higher pitch, craving temperatures around 202°F (94°C) to 205°F (96°C) to reveal their bright and fruity notes. Dark roasts, with their deep and sultry tones, often prefer a cooler stage of 198°F to 202°F (94°C)to showcase their rich, chocolaty essence. Single origins might demand a tailored approach, as their unique characteristics can shine through at specific temperatures. The key is to listen, adjust, and savor the symphony of flavors that emerge.
Fine-Tuning PID Settings for Consistency
Consistency is the hallmark of a great espresso shot. Once you’ve found your bean’s ideal temperature, it’s time to lock it in. A PID controller’s settings can be fine-tuned to keep the temperature steady, shot after shot. This means no more wild swings in flavor throughout the day. Your morning espresso will taste just as heavenly as your after-dinner sip. It’s all about finding that sweet spot and letting the PID keep it steady.
Common Pitfalls and How to Avoid Them

Even the most seasoned baristas can stumble when it comes to PID controllers. Common pitfalls include incorrect installation, which can lead to inaccurate temperature readings, and overlooking the importance of calibration. To avoid these, double-check your installation against the manufacturer’s instructions and calibrate your PID controller regularly. By doing so, you’ll ensure your machine is always performing at its best.
Electrical Safety Checks
When tinkering with the electrical innards of your espresso machine, safety should be your co-pilot. Always disconnect your machine from power before you begin. Double-check your wiring against the diagram provided with your PID controller. Loose or incorrect wiring isn’t just a performance issue; it’s a safety hazard. Once everything is connected, inspect your work before powering up the machine. A cautious approach is your best defense against electrical mishaps.
Ensuring Water Resistance of Components
Espresso machines are a dance of fire and water, and your PID controller is not a fan of the latter. When installing, ensure that all components are well-protected from moisture. Use water-resistant enclosures and sealants where necessary. This will prevent any unfortunate short-circuits and keep your PID controller in top shape, away from the splashes and steam of its watery environment.
Maintenance and Troubleshooting

Like any finely tuned instrument, your espresso machine with its PID controller requires regular maintenance. Keep an eye out for any changes in performance, which could signal a need for recalibration or repair. Clean your machine regularly, and check the PID controller’s connections and settings to ensure everything is in working order. With proper care, your machine will reward you with consistently perfect espresso for years to come.
Regular Cleaning and Care for Longevity
Your espresso machine is your trusty companion, and just like any good friendship, it thrives on a little TLC. Regular cleaning isn’t just about hygiene; it’s about keeping your machine and PID controller in tip-top shape. Dust off the PID controller with a soft cloth, and keep the area around it free from coffee grounds and spills. Descale your machine to prevent mineral buildup, which can affect temperature accuracy and overall performance. A clean machine is a happy machine, and a happy machine means consistently great espresso.
Identifying and Fixing Common PID Issues
Even the best tech can hiccup, and PID controllers are no exception. If your espresso starts tasting off, or the temperature seems erratic, it might be time for a PID health check. Common issues include a malfunctioning sensor or loose wiring. Check the connections first—sometimes it’s as simple as tightening a screw. If the problem persists, consult the manual or reach out to the manufacturer. Often, a quick recalibration or sensor replacement is all it takes to get back to brewing perfection.
Final Thoughts on Enhancing Your Espresso Experience
Upgrading your espresso machine with a PID controller is a journey worth taking for any coffee lover. It’s about precision, consistency, and unlocking the full potential of your beans. Remember, the best espresso is the one that suits your taste, and with a PID, you’re the master of every shot. So, take the plunge, install that PID, and get ready to experience your coffee in a whole new way.
Key Takeaways from PID Installation
Installing a PID controller can transform your espresso brewing experience by offering unparalleled temperature stability and control. Regular maintenance ensures longevity, while being vigilant about common issues keeps your machine running smoothly. Embrace the precision a PID brings, and savor the superior flavor in every cup.
Frequently Asked Questions (FAQ)

What are the signs that a PID controller needs recalibration?
Keep your senses sharp for these telltale signs:
- Inconsistent espresso temperature, which can lead to shots that are too hot or too cold.
- Flavor fluctuations in your espresso, such as unexpected bitterness or sourness.
- Unusual readings on the PID display that don’t match the expected temperature range.
- Longer than usual time for your machine to reach the set temperature.
If you notice any of these symptoms, it’s time to recalibrate. Most PID controllers have a straightforward recalibration process that you can do at home, ensuring that every espresso shot you pull is nothing short of excellence.
Can I install a PID controller on any espresso machine?
Most semi-automatic and automatic espresso machines can be upgraded with a PID controller, especially those that don’t already have one built-in. However, it’s not a one-size-fits-all situation. Some older or entry-level models might not be compatible or could require significant modifications. It’s best to check with the manufacturer or an expert before you start the project to ensure that your machine can handle the upgrade.
How does a PID improve the quality of espresso?
A PID controller fine-tunes the water temperature to the ideal range for espresso extraction. This precision prevents the common pitfalls of over-extraction (which makes your coffee bitter) and under-extraction (which makes it sour). By keeping the temperature steady, a PID controller helps in extracting all the right flavors from your coffee, resulting in a balanced and delicious espresso shot every time.
Is it possible to DIY the PID installation, or should I hire a professional?
If you’re comfortable with basic tools and have a knack for following technical instructions, you can certainly DIY the PID installation. Many PID kits come with detailed guides tailored to specific espresso machine models. However, if you’re not confident in your ability to handle electrical components safely, or if your machine is particularly complex or expensive, hiring a professional might be the wiser choice. They can ensure the installation is done correctly and safely, protecting both you and your machine.
How often should I check the PID settings for optimal performance?
It’s a good practice to check your PID settings every few months, especially if you notice any changes in your espresso’s taste or if the machine has been moved or cleaned. Regular checks will help you catch any drift in the temperature settings before it affects your brew. Additionally, if you switch to a different type of coffee bean, you may want to adjust the settings to match the new bean’s optimal extraction temperature.
In conclusion, installing a PID controller on your espresso machine can be a transformative experience. It brings a level of control and consistency that simply isn’t possible with standard thermostats. Whether you’re a home enthusiast or a professional barista, the precision of a PID will make a noticeable difference in the quality of your espresso. Just remember to assess your machine’s compatibility, follow safety protocols during installation, and maintain your equipment regularly. With a little effort and attention to detail, you can enjoy the perfect cup of espresso, shot after perfectly crafted shot. Happy brewing!
Embrace the journey of perfecting your espresso. The installation of a PID controller is not just about the technical upgrade—it’s about enhancing your daily ritual, the artistry of your craft, and the joy found in a cup of coffee made exactly to your liking.


